The temperature just dropped to 40°F, and you're stuck outside with no tent. You've got maybe two hours before hypothermia becomes a real threat. This is where a $10 tarp and 50 feet of paracord can save your life.
Most people think emergency shelter requires expensive gear or advanced bushcraft skills. Wrong. A properly rigged tarp shelter can keep you dry, block wind, and retain body heat better than many cheap tents. I've used these setups in rain, snow, and 20°F nights, and they work.
What You Need
Complete Shopping List
| Item | Where to Buy | Cost | Notes |
|---|---|---|---|
| 8x10 tarp (blue poly) | Hardware store, Walmart | $5 to $7 | Get grommets on all corners |
| 50ft paracord (550 cord) | Hardware store, Army surplus | $3 to $5 | Real 550 cord, not craft cord |
| Total | $8 to $12 |
That's it. Two items. No stakes, no poles, no complicated hardware.
Why These Materials Work
Tarps: Waterproof, windproof, lightweight, and versatile. The blue poly tarps from hardware stores are cheap but effective. They'll last 6 to 12 months of regular use before UV damage sets in.
Paracord: Strong (550-pound test), doesn't stretch when wet, and has multiple uses beyond shelter (tourniquets, fishing line, bootlaces). The inner strands can be pulled out for finer cordage.
The Three Essential Shelter Configurations
You need to know three setups. Each serves a different weather condition.
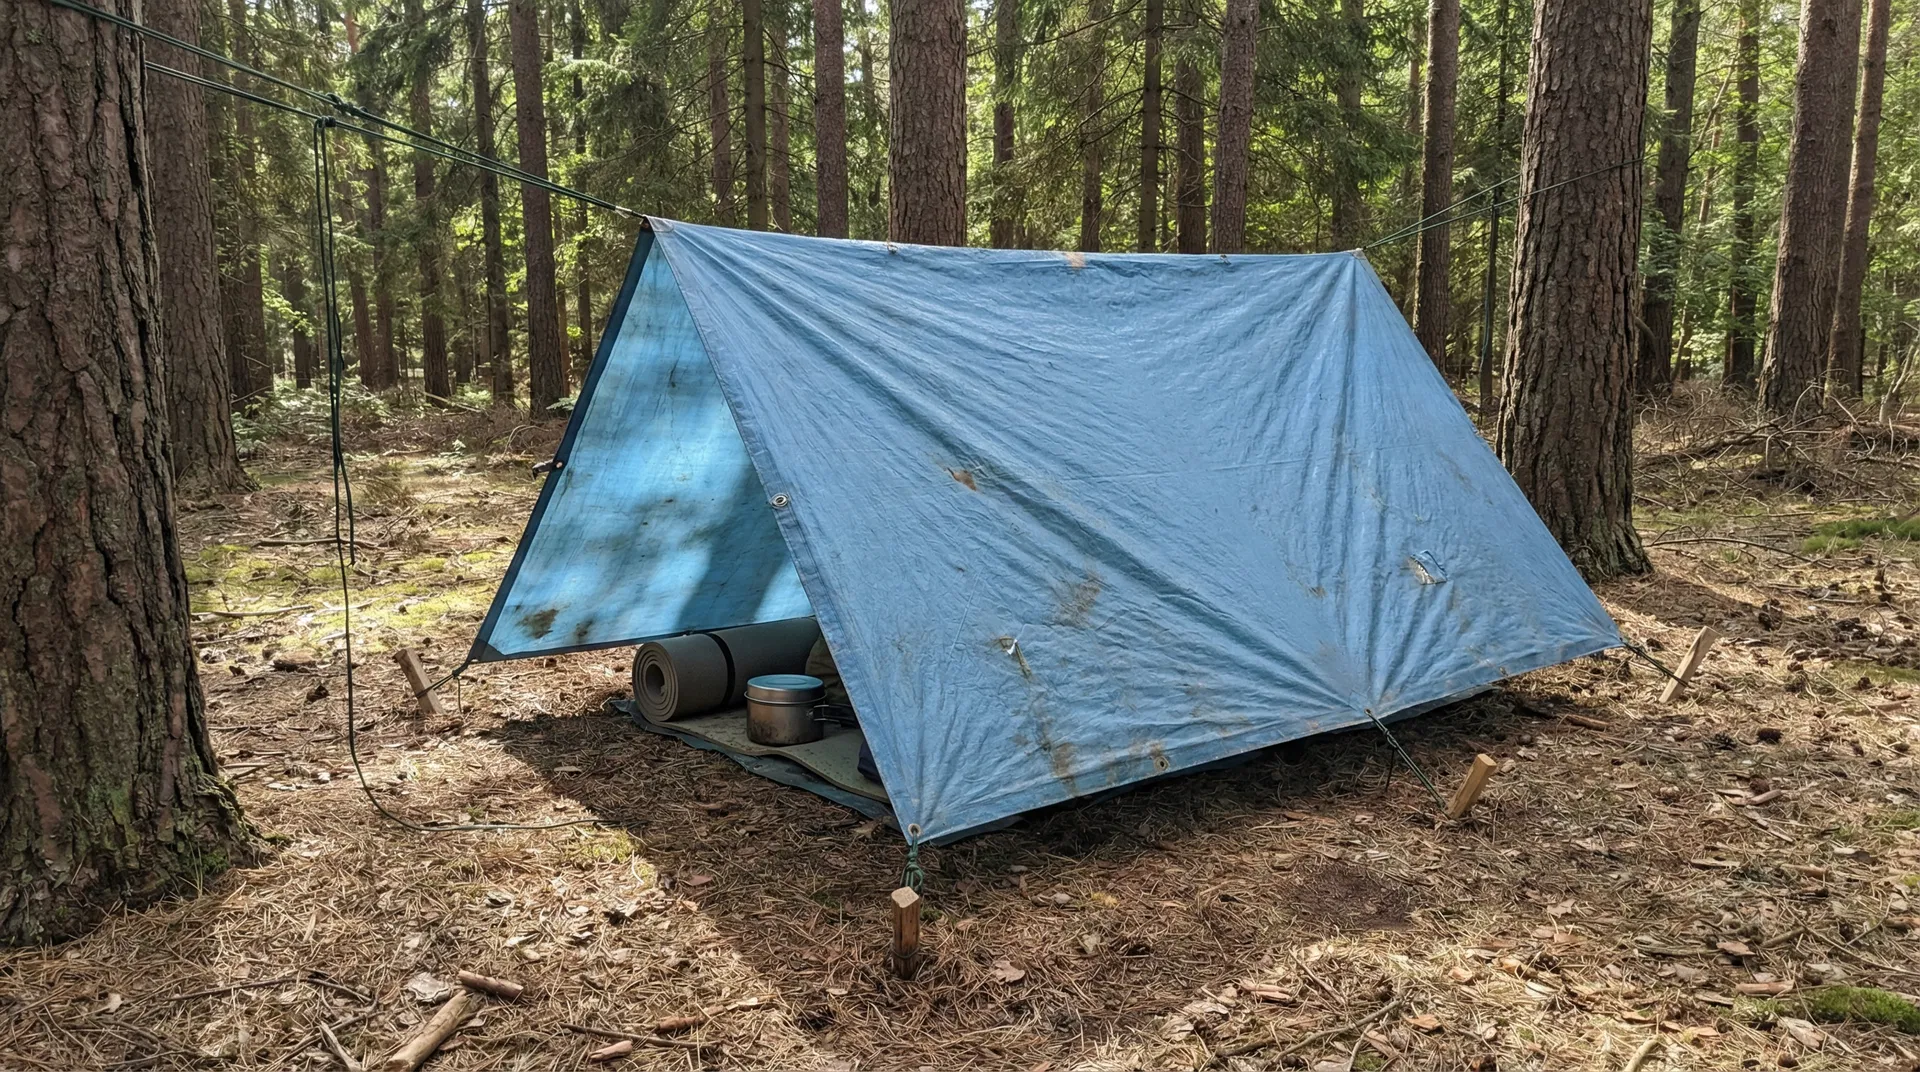
1. A-Frame (Rain Protection)
Best for: Heavy rain, moderate wind
Setup time: 5 to 7 minutes
Warmth rating: Moderate
How to build:
- Find two trees 8 to 10 feet apart
- Tie paracord between trees at chest height (this is your ridgeline)
- Drape tarp over ridgeline so it hangs evenly on both sides
- Pull out bottom corners at 45-degree angles
- Tie corners to trees, stakes, or heavy rocks
- Adjust tension so water runs off, not pools
Key details:
- Make one end lower than the other so rain drains away from your sleeping area
- Leave a 6-inch gap at the high end for ventilation (prevents condensation)
- Sleep perpendicular to the ridgeline, head toward the high end
2. Lean-To (Wind Protection)
Best for: Strong wind, cold temperatures
Setup time: 4 to 6 minutes
Warmth rating: High (with fire)
How to build:
- Tie paracord between two trees at waist height
- Drape tarp over cord so one side touches the ground
- Stake or weigh down the ground edge
- Pull out the two top corners at 45-degree angles to create a roof
- Build a small fire 4 to 6 feet in front of the opening
Key details:
- Face the closed side into the wind
- The angled roof reflects fire heat back into the shelter
- Keep the fire small (fist-sized flames) to avoid melting the tarp
- This setup can raise internal temperature 15 to 20°F above ambient
3. Diamond Fly (All-Weather)
Best for: Rain + wind, unknown conditions
Setup time: 8 to 10 minutes
Warmth rating: Moderate to high
How to build:
- Tie paracord between trees at head height
- Fold tarp diagonally to create a diamond shape
- Drape the fold over the ridgeline
- Stake out all four corners to create a pyramid shape
- Adjust tension so all sides are taut
Key details:
- This creates a fully enclosed shelter with one open end
- Provides 270-degree wind protection
- Best all-around setup if you're unsure about weather
- Can close the open end with a backpack or debris
Critical Knots You Must Know
You only need two knots. Practice them now, before you're cold and shaking.
Taut-Line Hitch (Adjustable)
Use this to tie corners to trees or stakes. It slides when you want it to, locks when you don't.
Steps:
- Wrap cord around tree twice
- Cross the working end over the standing line
- Wrap it around the standing line three times moving toward the tree
- Bring the working end back and make one wrap on the other side
- Pull tight
Test: You should be able to slide the knot up or down the line to adjust tension, but it locks under load.
Bowline (Fixed Loop)
Use this to create attachment points or tie the ridgeline.
Steps:
- Make a small loop in the standing line (the "rabbit hole")
- Pass the working end up through the loop (rabbit comes out)
- Wrap it around the standing line (rabbit goes around the tree)
- Pass it back down through the original loop (rabbit goes back in the hole)
- Pull tight
Test: The loop should not slip or tighten under load.
Site Selection: Where to Set Up
Your shelter location matters as much as the shelter itself.
Look for:
- Two sturdy trees 8 to 12 feet apart (test by pushing hard)
- High ground so rain doesn't pool under you
- Natural windbreak (hill, rock formation, dense trees)
- Dry ground (no standing water, no soft mud)
- Overhead clearance (no dead branches that could fall)
Avoid:
- Valley bottoms (cold air sinks, creates frost pockets)
- Dry creek beds (flash flood risk)
- Lone trees (lightning targets)
- Animal trails (you're in their path)
- Directly under large dead branches ("widowmakers")
Cold Weather Modifications
A basic tarp shelter in 20°F weather will keep you alive, but you need these upgrades to stay comfortable.
Ground Insulation (Critical)
Cold ground steals body heat faster than cold air. You need a barrier.
Options:
- Pine boughs (6-inch thick layer)
- Dry leaves (12-inch thick layer, compressed to 6 inches)
- Cardboard (if you have it)
- Your backpack (sleep on it)
Rule: If you can feel the ground through your insulation, you need more.
Reflector Wall
Build a wall of stacked logs or rocks behind your fire. This reflects heat into the shelter and can double the warmth.
How:
- Stack green logs (won't burn) or rocks 3 feet high
- Angle the wall slightly toward your shelter
- Position it 2 feet behind the fire
- Heat bounces off the wall into your space
Enclosed Ends
Close the open ends of your shelter with:
- Extra clothing
- Your backpack
- Piled leaves or pine boughs
- A second tarp (if you have one)
This traps warm air and blocks wind.
Common Mistakes That Kill People
Mistake 1: Setting Up in the Dark
You can't see hazards (dead branches, ant hills, poison ivy) in the dark. Set up shelter before sunset, even if you think you won't need it.
Mistake 2: Ignoring Condensation
Your breath creates moisture. In an enclosed tarp shelter, this turns into water droplets that soak your gear. Always leave a ventilation gap.
Mistake 3: Tying Knots Too Tight
Wet paracord shrinks. If you tie knots at maximum tension, they'll become impossible to untie when wet. Leave 10% slack.
Mistake 4: Camping Under Dead Trees
Dead branches ("widowmakers") fall without warning, especially in wind. Look up before you set up.
Mistake 5: No Ground Insulation
You'll lose more heat to the ground than to the air. Insulation under you is more important than insulation over you.
When to Upgrade Your Setup
This $10 system works, but it has limits.
Stick with tarps if:
- You're on a tight budget
- Weight matters (backpacking, bug-out bag)
- You need versatility (multiple configurations)
- You're in mild to moderate weather
Upgrade to a tent if:
- You're in heavy snow (tarps don't shed snow well)
- You need bug protection (mosquitoes, ticks)
- You're in one location for weeks
- You have the budget ($50+ for a decent tent)
Practice Before You Need It
Set up each configuration in your backyard. Time yourself. Do it in the rain. Do it in the dark with a headlamp.
Drill:
- Set up A-frame in under 7 minutes
- Set up lean-to in under 6 minutes
- Set up diamond fly in under 10 minutes
- Tie taut-line hitch with your eyes closed
- Tie bowline with your eyes closed
If you can't do these, you're not ready.
Real-World Scenarios
Scenario 1: Car Breakdown in Rain
You're stuck on a rural road in a downpour. Your car won't start, and cell service is dead.
Solution:
- A-frame shelter between two roadside trees
- Use the tarp to stay dry while you wait
- Reflective tarp surface makes you more visible to passing cars
- Stay warm and dry for hours while help arrives
Scenario 2: Lost While Hiking
You took a wrong turn, and now it's getting dark. Temperature is dropping fast.
Solution:
- Lean-to shelter facing away from wind
- Small fire in front for warmth
- Ground insulation from pine boughs
- Survive the night comfortably, find your way out in daylight
Scenario 3: Power Outage in Winter
Your heat is out, and it's 30°F inside your house.
Solution:
- Diamond fly shelter in your living room (yes, indoors)
- Creates a smaller space to heat with body warmth
- Traps warm air around your sleeping area
- Can raise temperature 10 to 15°F in the enclosed space
The Bottom Line
A $10 tarp and paracord setup is not a luxury camping system. It's a survival tool. It will keep you alive in conditions that would otherwise kill you.
The difference between someone who survives and someone who doesn't often comes down to knowledge, not gear. You now have the knowledge. Go practice.
Sources and References
- U.S. Army Survival Manual FM 21-76 - Official military survival training, includes tarp shelter configurations
- National Weather Service: Cold Weather Safety - Hypothermia prevention and recognition
- REI Expert Advice: Tarp Shelters - Detailed setup instructions and configurations
- Leave No Trace Center for Outdoor Ethics - Responsible shelter site selection and environmental impact
- American Red Cross: Wilderness and Remote First Aid - Emergency shelter as part of survival first aid
No comments yet. Be the first to share your thoughts!